HP Pavilion – 14-ce0017tx 4HK90PA Product Specifications review and parts list

HP Pavilion – 14-ce0017tx 4HK90PA Product Specifications

Hardware:

  • Product Number: 4HK90PA
  • Product Name: HP Pavilion – 14-ce0017tx
  • Microprocessor: Intel® Core™ i5-8250U (1.6 GHz base frequency, up to 3.4 GHz with Intel® Turbo Boost Technology, 6 MB cache, 4 cores)
  • Memory, Standard: 4 GB DDR4-2400 SDRAM (1 x 4 GB)
  • Hard Drive: 500 GB 5400 rpm SATA
  • Display: 14″ diagonal FHD IPS BrightView WLED-backlit (1920 x 1080)
  • Keyboard: Full-size island-style keyboard
  • Pointing Device: HP Imagepad with multi-touch gesture support
  • Wireless Connectivity: Intel® Wireless-AC 3168 802.11ac (1×1) Wi-Fi® and Bluetooth® 4.2 Combo
  • Network Interface: Integrated 10/100/1000 GbE LAN
  • Expansion Slots: 1 multi-format SD media card reader
  • External Ports: 1 HDMI; 1 headphone/microphone combo; 1 RJ-45; 2 USB 3.1 Gen 1 (Data transfer only); 1 USB 3.1 Type-C™ Gen 1 (Data Transfer Only)
  • Minimum Dimensions (W x D x H): 32.68 x 22.17 x 1.79 cm
  • Weight: Starting at 1.59 kg
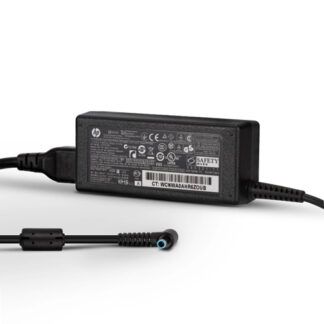
  • Power Supply Type: 65 W EM AC power adapter
  • Battery Type: 3-cell, 41 Wh Li-ion
  • Webcam: HP Wide Vision HD Camera with integrated dual array digital microphone
  • Audio Features: B&O PLAY, dual speakers, HP Audio Boost

Software:

  • Operating System: Windows 10 Home 64
  • HP Apps: HP Audio Switch; HP Documentation; HP ePrint; HP JumpStart; HP Recovery Manager; HP Support Assistant; HP Sure Connect
  • Software Included: McAfee LiveSafe™

Review:

The HP Pavilion – 14-ce0017tx is a reliable and versatile laptop designed to meet the needs of everyday computing. Powered by an Intel® Core™ i5-8250U processor with Turbo Boost Technology, it delivers responsive performance for multitasking and demanding applications.

With a 14″ FHD IPS BrightView WLED-backlit display, users can enjoy crisp visuals and vibrant colors. The full-size island-style keyboard and HP Imagepad with multi-touch gesture support enhance the overall user experience, providing comfort and efficiency.

The laptop offers seamless connectivity options, featuring Intel® Wireless-AC technology for fast and reliable Wi-Fi, along with Bluetooth® 4.2 Combo. The inclusion of multiple USB ports, HDMI, and a USB Type-C™ Gen 1 port ensures versatile connectivity for peripherals and external devices.

Weighing in at just 1.59 kg and with a slim profile, the Pavilion is highly portable, making it ideal for on-the-go productivity. The 3-cell, 41 Wh Li-ion battery provides a decent amount of runtime, complemented by a 65 W EM AC power adapter for efficient charging.

The HP Wide Vision HD Camera with integrated dual array digital microphone enhances video conferencing and online communication. Audio features, including B&O PLAY, dual speakers, and HP Audio Boost, deliver a rich and immersive sound experience for both work and entertainment.

Running on Windows 10 Home 64, the Pavilion comes pre-installed with useful HP apps, ensuring a seamless and user-friendly experience. The inclusion of McAfee LiveSafe™ adds an extra layer of security to safeguard against online threats.

In summary, the HP Pavilion – 14-ce0017tx strikes a balance between performance, portability, and features, making it a solid choice for users seeking a reliable and stylish laptop for everyday use.

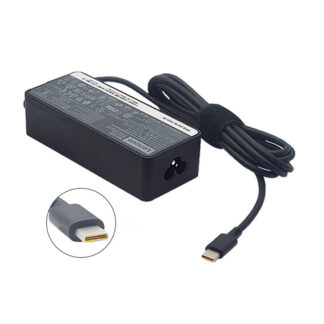
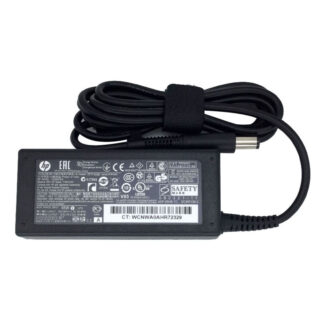
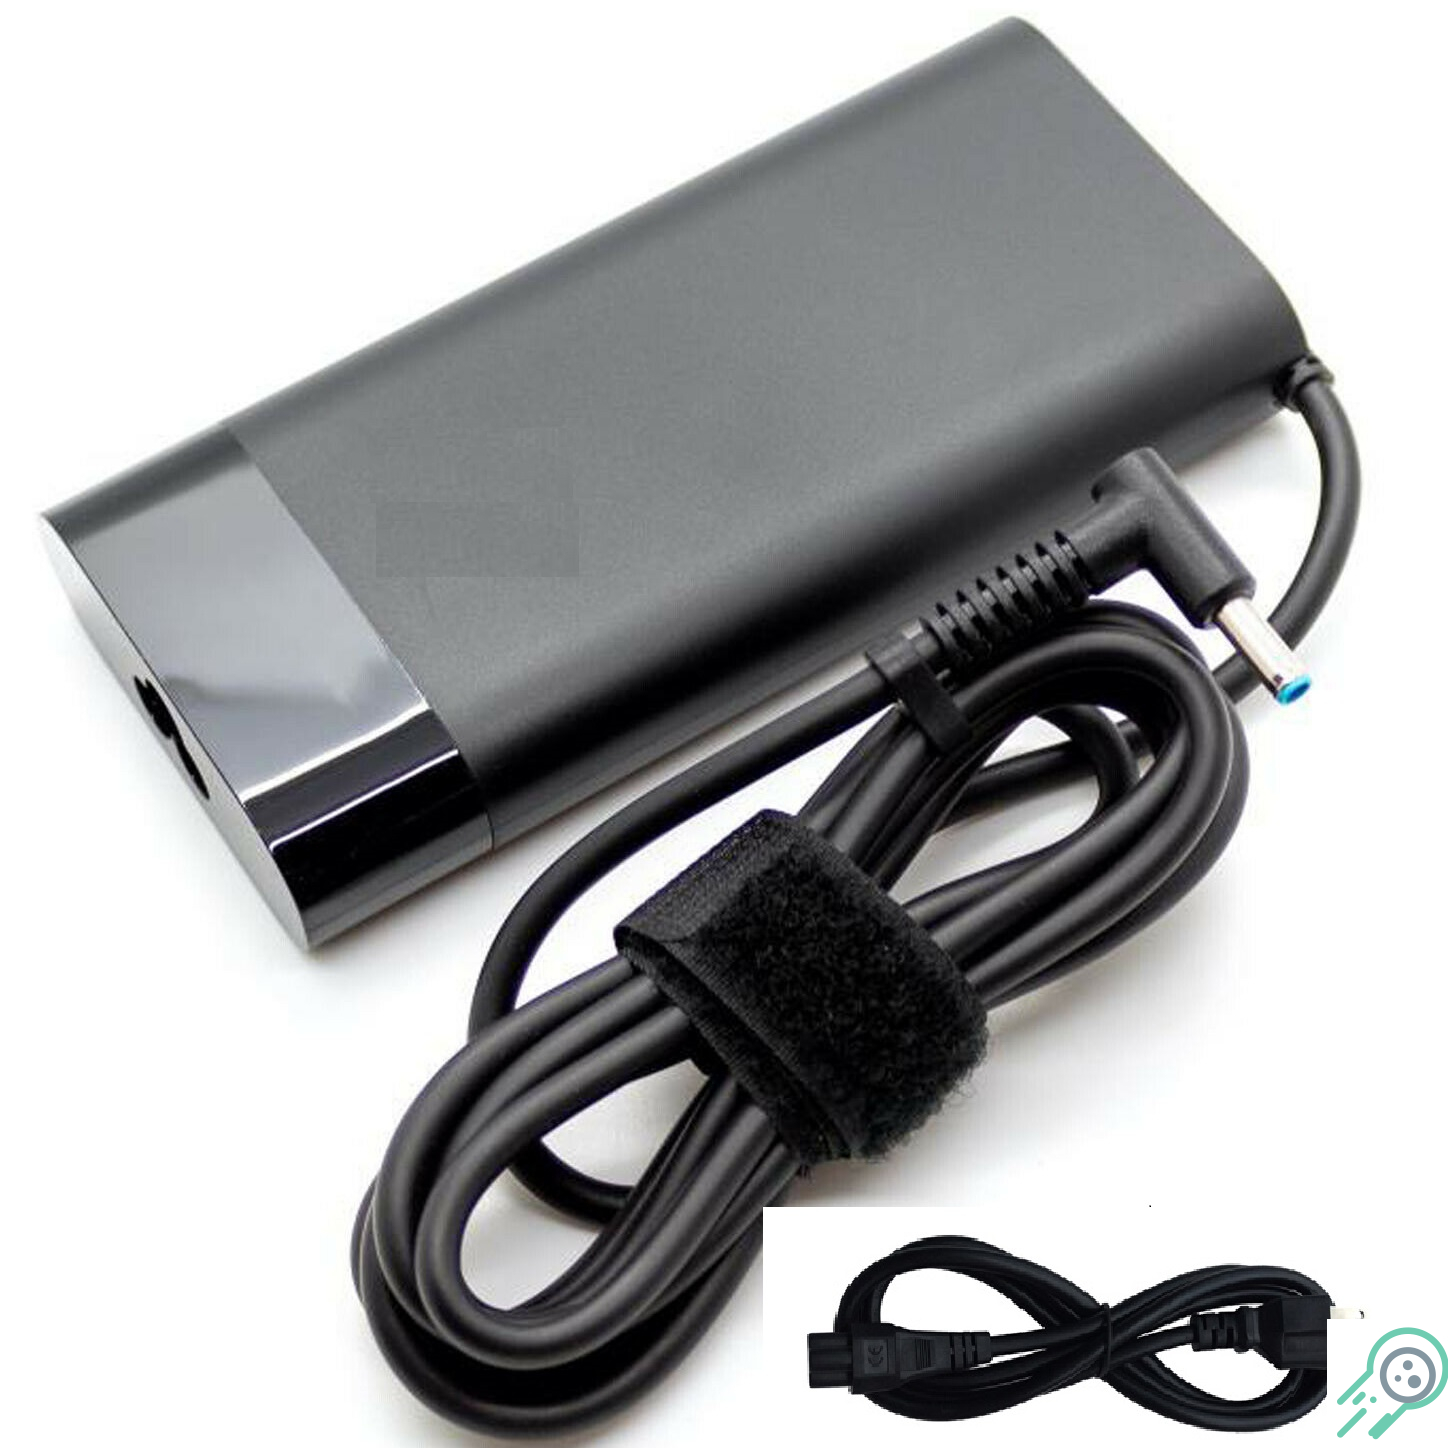
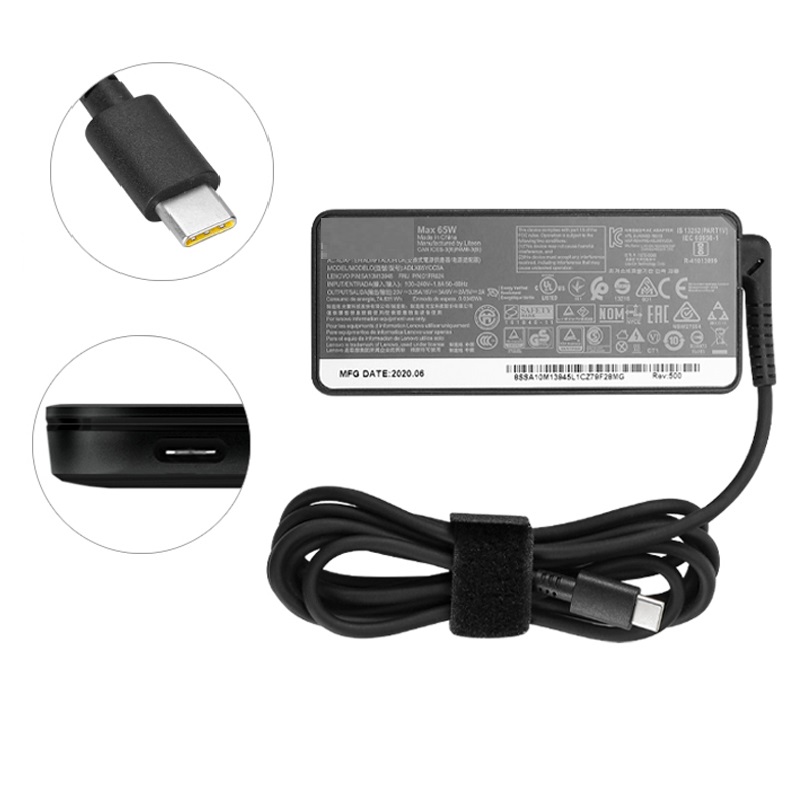
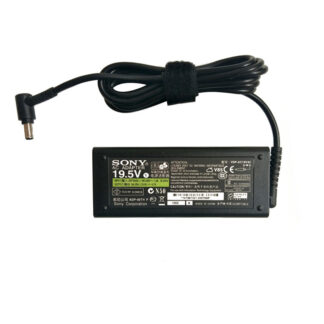
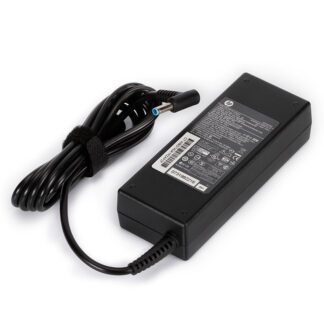
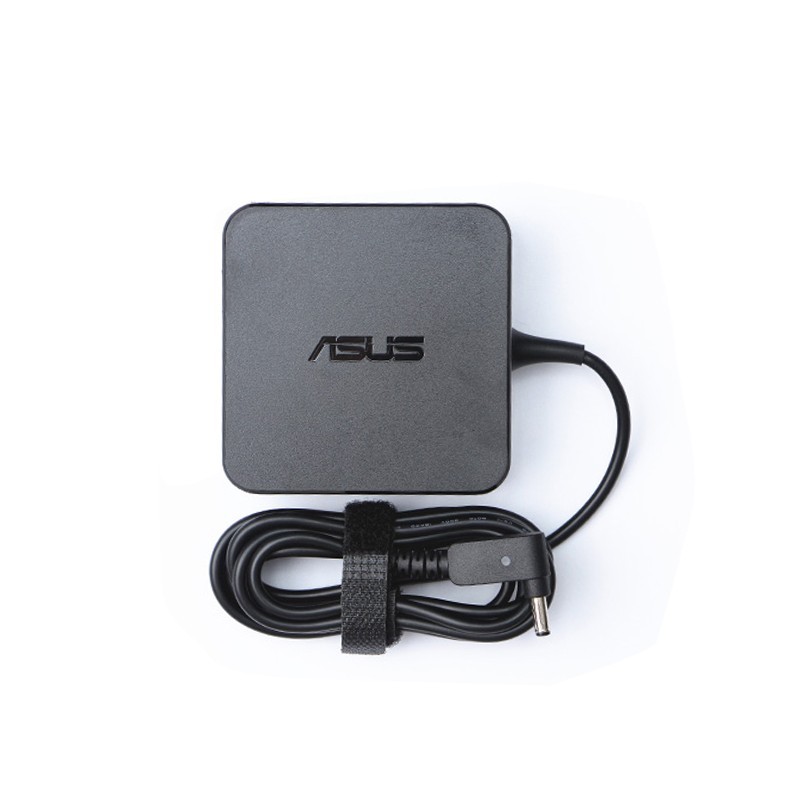
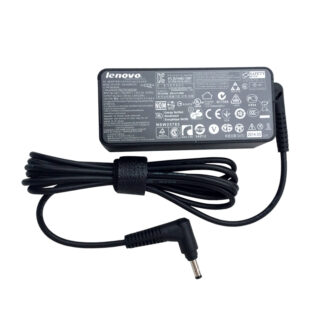
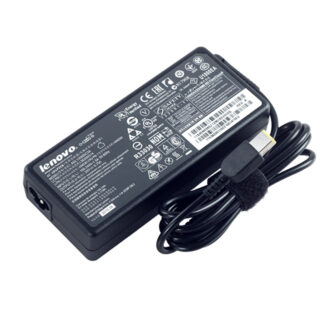
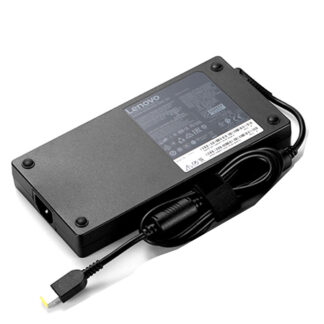
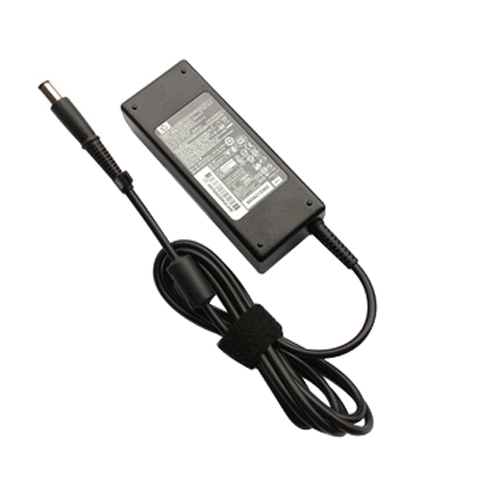
AC Adapter

Battery

  • Part Number: L11119-855
  • Part Description: Assembly-battery 3C 41W 3.6A LI HT030
  • CSR: Compliant/Exempted
  • ROHS: N/A
  • FE: N/A

Bezel

  • Part Number: L19181-001
  • Part Description: LCD BEZEL
  • CSR: Compliant
  • ROHS: N/A
  • FE: N/A

Cable (Internal)

  • Part Number: L19153-001
  • Part Description: USB BOARD CABLE
  • CSR: Compliant
  • ROHS: N/A
  • FE: N/A
  • Part Number: L19155-001
  • Part Description: SD BOARD CABLE
  • CSR: Compliant
  • ROHS: N/A
  • FE: N/A
  • Part Number: L19167-001
  • Part Description: TOUCHPAD CABLE
  • CSR: Compliant
  • ROHS: N/A
  • FE: N/A
  • Part Number: L19172-001
  • Part Description: HDD CABLE
  • CSR: Compliant
  • ROHS: N/A
  • FE: N/A
  • Part Number: L19187-001
  • Part Description: LCD CABLE
  • CSR: Compliant
  • ROHS: N/A
  • FE: N/A

Connectivity Kit

  • Part Number: L19470-001
  • Part Description: K LOCK
  • CSR: Compliant
  • ROHS: N/A
  • FE: N/A

Connector

  • Part Number: 808155-021
  • Part Description: GNRC D CIN CAL50 8p 4.5mm90W L50 8P15 PT
  • CSR: Compliant
  • ROHS: N/A
  • FE: N/A

Display

  • Part Number: L19199-001
  • Part Description: LCD RAW PANEL 14 FHD BV UWVA NWBZ
  • CSR: Compliant/Exempted
  • ROHS: N/A
  • FE: N/A

Drive

  • Part Number: 778186-005
  • Part Description: 500GB SATA hard disk drive – 5,400 RPM, 7.0mm form factor – Raw drive, does not include hard drive bracket or screws
  • CSR: Duty-To-Declare
  • ROHS: N/A
  • FE: N/A

Fan

  • Part Number: L19159-001
  • Part Description: FAN DSC
  • CSR: Compliant/Exempted
  • ROHS: N/A
  • FE: N/A

Hardware Kit

  • Part Number: L19170-001
  • Part Description: RUBBER FEET Natural Silver
  • CSR: Compliant
  • ROHS: N/A
  • FE: N/A
  • Part Number: L19189-001
  • Part Description: SCREW
  • CSR: Compliant
  • ROHS: N/A
  • FE: N/A
  • Part Number: L19469-001
  • Part Description: HDD BRACKET
  • CSR: Compliant
  • ROHS: N/A
  • FE: N/A
  • Part Number: L29768-001
  • Part Description: MISCELLANEOUS KIT – Tape on the LCD connector
  • CSR: Compliant
  • ROHS: N/A
  • FE: N/A

Keyboard-Internal

  • Part Number: L19194-001
  • Part Description: TOP COVER W/KB Natural Silver FPR US
  • CSR: Compliant/Exempted
  • ROHS: N/A
  • FE: N/A

Memory (DIMM)

  • Part Number: L10598-855
  • Part Description: SODIMM 4GB 2666MHz 1.2v DDRM
  • CSR: Compliant/Exempted
  • ROHS: N/A
  • FE: N/A

Optical Unit

  • Part Number: L18505-001
  • Part Description: WEBCAM HD
  • CSR: Compliant/Exempted
  • ROHS: N/A
  • FE: N/A

PC Board

  • Part Number: L18495-001
  • Part Description: MOTHERBOARD DSC MX150 2GB i5-8250U FPR
  • CSR: Compliant/Exempted
  • ROHS: N/A
  • FE: N/A
  • Part Number: L18495-601
  • Part Description: MOTHERBOARD DSC MX150 2GB i5-8250U FPR WIN
  • CSR: Compliant/Exempted
  • ROHS: N/A
  • FE: N/A

PC Board (Interface)

  • Part Number: L19152-001
  • Part Description: USB BOARD
  • CSR: Compliant/Exempted
  • ROHS: N/A
  • FE: N/A
  • Part Number: L19154-001
  • Part Description: SD/CR BOARD
  • CSR: Compliant/Exempted
  • ROHS: N/A
  • FE: N/A
  • Part Number: L19163-001
  • Part Description: FINGERPRINT READER Natural Silver
  • CSR: Compliant
  • ROHS: N/A
  • FE: N/A
  • Part Number: L19165-001
  • Part Description: TOUCHPAD BOARD Natural Silver
  • CSR: Compliant
  • ROHS: N/A
  • FE: N/A

Plastics Kit

  • Part Number: L19168-001
  • Part Description: BASE ENCLOSURE Natural Silver
  • CSR: Compliant/Exempted
  • ROHS: N/A
  • FE: N/A
  • Part Number: L19174-001
  • Part Description: LCD BACK COVER Mineral Silver
  • CSR: Compliant/Exempted
  • ROHS: N/A
  • FE: N/A
  • Part Number: L19183-001
  • Part Description: HINGE CAP Natural Silver
  • CSR: Compliant
  • ROHS: N/A
  • FE: N/A
  • Part Number: L19185-001
  • Part Description: LCD HINGE
  • CSR: Compliant
  • ROHS: N/A
  • FE: N/A

Service Kit

  • Part Number: L19156-001
  • Part Description: HEATSINK DSC
  • CSR: Compliant
  • ROHS: N/A
  • FE: N/A
  • Part Number: L19161-001
  • Part Description: SPEAKER DUAL
  • CSR: Compliant
  • ROHS: N/A
  • FE: N/A
  • Part Number: L19179-001
  • Part Description: ANTENNA DUAL
  • CSR: Compliant
  • ROHS: N/A
  • FE: N/A

Tape

  • Part Number: L28524-001
  • Part Description: LCD ADHESIVE
  • CSR: Compliant
  • ROHS: N/A
  • FE: N/A

Wireless Interface

  • Part Number: 863934-855
  • Part Description: Intel Dual Band Wireless-AC 3168 802.11 ac 1×1 WiFi + Bluetooth 4.2 combination WLAN module
  • CSR: Compliant/Exempted
  • ROHS: N/A
  • FE: N/A

HP Spectre Foldable 17-CS0097NR 8U7F1UA Specs TECHNICAL DETAILS and parts list

The HP Spectre Foldable 17-CS0097NR is a groundbreaking device that seamlessly combines cutting-edge technology with innovative design, creating a unique user experience. Here’s a comprehensive review based on its specifications:

Design and Build: The Spectre Foldable boasts an impressively sleek and lightweight design, measuring 10.91 x 14.81 x 0.33 inches when unfolded and 10.91 x 7.53 x 0.84 inches when folded. The slate blue color adds a touch of sophistication, making it visually appealing. The detachable full-size Rudy Black soft cover Bluetooth keyboard enhances its versatility, allowing users to switch between laptop and tablet modes effortlessly.

Display: The 17-inch foldable OLED display is the highlight of this device. With a 2.5K resolution (1920 x 2560), touch functionality, and impressive specs like SDR 400 nits and HDR 500 nits, the display delivers vibrant colors and sharp imagery. The low blue light feature adds to the overall user comfort, making it suitable for extended usage.

Performance: Equipped with an Intel® Core™ i7-1250U processor and Intel® Evo™ laptop technology, the Spectre Foldable delivers exceptional performance. The integrated Intel® Iris® Xᵉ Graphics ensures smooth visuals for both work and entertainment. The 16 GB LPDDR5 RAM and a 1 TB PCIe Gen4 NVMe TLC SSD contribute to snappy responsiveness and ample storage space.

Battery Life: The Spectre Foldable’s battery life is impressive, offering up to 12 hours and 30 minutes in foldable mode and up to 11 hours and 45 minutes in detachable mode. The fast-charging feature, reaching approximately 50% in just 45 minutes, adds to its convenience, ensuring minimal downtime.

Connectivity: The inclusion of Intel® Wi-Fi 6E AX211 and Bluetooth® 5.3 ensures high-speed wireless connectivity. The Thunderbolt™ 4 ports provide versatile connectivity options, supporting USB Power Delivery and DisplayPort™ 1.4.

Audio and Visuals: Audio by Bang & Olufsen, DTS:X® Ultra, quad speakers, and HP Audio Boost combine to deliver an immersive audio experience. The 5MP IR camera with temporal noise reduction and integrated dual array digital microphones enhance video conferencing and content creation.

Security and Extras: The Spectre Foldable prioritizes user security with features like a mic mute key, camera privacy switch, and Trusted Platform Module (Discrete TPM) support. The inclusion of the HP Rechargeable MPP2.0 Tilt Pen and ENVY USB-C Hub adds value to the overall package.

Software and Warranty: The device comes with pre-installed McAfee LiveSafe™, a 1-month Adobe free trial, and a 1-month free trial for Xbox Game Pass and Intel® Unison™. The 1-year limited hardware warranty and technical support provide users with peace of mind.

Conclusion: The HP Spectre Foldable 17-CS0097NR is a remarkable fusion of form and function, offering a stunning display, powerful performance, and a range of features that cater to both productivity and entertainment needs. While the price point may be higher, the innovation and versatility make it a compelling choice for users seeking a premium and unique computing experience.

Here comes the parts list for it:

AC Adapter

  • Part Number: N58480-001
  • Part Description: SKO-AC ADPTR 100+10W Slim USB-C+A EDNA
  • CSR: Duty-To-Declare
  • ROHS: N/A
  • FE: N/A

Accessory

  • Part Number: L39572-001
  • Part Description: HP Elite USB-C Multi Port Hub
  • CSR: Compliant/Exempted
  • ROHS: N/A
  • FE: N/A

Cable (Internal)

  • Part Number: N62235-001
  • Part Description: CABLE KEYBOARD USB-C TO POGO PING
  • CSR: Not Assigned
  • ROHS: N/A
  • FE: N/A

Keyboard-Internal

  • Part Number: N62234-001
  • Part Description: KEYBOARD RBL US
  • CSR: Not Assigned
  • ROHS: N/A
  • FE: N/A

Power Cord

  • Part Number: L22319-001
  • Part Description: Power cord – C5 1.0M STR Prm NA
  • CSR: Duty-To-Declare
  • ROHS: N/A
  • FE: N/A

Stylus

  • Part Number: N62401-001
  • Part Description: PEN TILT WRLSChargingBLR MPP2.0
  • CSR: Compliant/Exempted
  • ROHS: N/A
  • FE: N/A

Resolving “Plugged in Not Charging” Issue on Dell Latitude 5310 2-in-1

Introduction: Users of the Dell Latitude 5310 2-in-1 may encounter an issue where the system battery displays a “Plugged in, Not Charging” message when hovering over the battery icon. This article aims to provide a comprehensive guide to troubleshoot and resolve this common problem.

Symptoms: The primary symptom is the appearance of the “Plugged in, Not Charging” message, despite the battery charging outside the operating system, such as in system BIOS or during the one-time boot menu.

Possible Causes: Several factors could contribute to this issue, including an aging battery, a battery nearing the end of its life, problems with the AC adapter, or potential hardware-related issues.

Troubleshooting Steps:

  1. Verify AC Adapter Functionality:
    • Restart the computer and access the BIOS setup (F2 key during Dell logo).
    • Check if the AC adapter is recognized in the BIOS.
    • Ensure the AC adapter type is correctly identified.
    • If issues found on the AC Adapter, buy here
  2. Charge the Battery in BIOS Mode or with the Laptop Turned Off:
    • Turn off the computer.
    • Charge the battery either with the laptop turned off or in BIOS mode.
    • Verify if the battery charge percentage increases.
  3. Run the Dell Hardware Diagnostic Test:
    • Access the One Time Boot Menu (F12 key during Dell logo).
    • Select Diagnostics to run the hardware diagnostic test.
    • Note down error codes if the test fails and contact Dell Technical Support.
  4. Check Battery Health Status:
    • Assess the battery health status both inside and outside the operating system.
    • Understand that battery life and capacity decrease over time, and this is considered normal wear.
  5. Update the BIOS and Dell Quickset:
    • Ensure the laptop battery is installed and connected to the AC adapter.
    • Update the BIOS to the latest version.
    • Consider installing or updating Dell Quickset for enhanced power management.
  6. Run Windows Troubleshooter for Battery Issues:
    • Utilize the Windows Hardware and Devices troubleshooter built into the operating system.
    • Follow the troubleshooting steps to address potential system-level issues.
  7. Uninstall and Reinstall Microsoft ACPI Battery Driver:
    • Access Device Manager (devmgmt.msc).
    • Locate the Batteries section and uninstall the Microsoft ACPI-Compliant Control Method Battery driver.
    • Restart the computer to allow the driver to reinstall.

Conclusion: Resolving the “Plugged in, Not Charging” issue on the Dell Latitude 5310 2-in-1 involves a series of systematic troubleshooting steps. Users are advised to follow each step carefully, and if the problem persists, contacting Dell Technical Support with any error codes obtained during diagnostics is recommended. Regular maintenance and keeping system drivers up to date can contribute to a more reliable and efficient laptop performance.

Troubleshooting AC Adapter Issues on Dell CN-0J62H3: A Comprehensive Guide

Introduction: Dell CN-0J62H3, like any electronic device, may encounter AC adapter issues that can hinder proper functioning. This article provides an in-depth guide on troubleshooting and resolving common AC adapter-related problems, ensuring users can efficiently address issues such as failure to charge the battery or power on the laptop. Resolving “Plugged in Not Charging” Issue on Dell CN-0J62H3

Symptoms of AC Adapter Issues: Users are encouraged to troubleshoot AC adapter problems if they observe any of the following symptoms:

  • Inability to charge the battery.
  • Failure to power on the Dell CN-0J62H3.
  • AC adapter LED is off.
  • AC adapter LED turns off after connecting to the machine Dell CN-0J62H3.
  • Error message indicating the inability to determine the AC adapter type, impacting computer performance.

Possible Causes: AC adapter issues can stem from various sources, including a faulty AC adapter, damaged power cables, issues with the DC-in connector on the laptop, or other related problems. It’s crucial to identify the root cause to implement effective solutions.

Resolution: Troubleshooting Steps:

  1. Inspect for Damages:
    • Check the AC adapter, cables, and the adapter port on the laptop for physical damage.
    • Examine the AC adapter cable, power cable, and the pins for signs of wear, fraying, or exposure.
  2. Verify Wall Outlet Functionality:
    • Ensure the wall outlet is working correctly by connecting another device.
    • Plug the AC adapter directly into the wall outlet to isolate issues with power regulators or docking stations.
  3. Drain Residual Power:
    • Disconnect all devices.
    • Remove the battery (if removable) and drain residual power by holding the power button for 30 seconds.
    • Reconnect the battery and test the laptop.
  4. Connect to the Correct USB-C Power Port:
    • For laptops with USB-C charging ports, ensure the USB-C charger is connected to the correct port supporting charging.
  5. Reseat Power Cable and AC Adapter:
    • Disconnect and reconnect the power cable and AC adapter.
    • Check the LED indicator on the AC adapter for proper functioning.
  6. Check AC Adapter LED Indicator:
    • Reset the AC adapter by unplugging it for 15 seconds.
    • Reconnect and check the LED indicator’s status.
  7. Verify AC Adapter Wattage:
    • Confirm the correct wattage of the AC adapter to avoid issues like error messages or slow charging.
    • Check the BIOS to ensure the laptop recognizes the AC adapter type correctly.
  8. Run Dell ePSA Hardware Diagnostic Test on Dell CN-0J62H3:
    • Use Dell SupportAssist Preboot System Assessment or ePSA test to identify hardware issues.
    • Note error codes and contact Dell Technical Support if necessary.
  9. Update the BIOS:
    • Ensure the laptop’s battery is installed and connected to the AC adapter.
    • Update the BIOS to the latest version of Dell CN-0J62H3 for improved AC adapter recognition.

Conclusion: Troubleshooting AC adapter issues on Dell CN-0J62H3 involves a systematic approach to identify and address potential problems. Users are advised to follow these steps carefully, and if issues persist, contacting Dell Technical Support is recommended. Regular maintenance, proper handling of AC adapters, and timely updates contribute to a more reliable and efficient laptop experience. Order the right  Dell CN-0J62H3 AC Adapter Charger

Dell CN-0J62H3   AC Adapter Charger

Troubleshooting AC Adapter Issues on Dell 04H6NV 4H6NV: A Comprehensive Guide

Introduction: Dell 04H6NV 4H6NV, like any electronic device, may encounter AC adapter issues that can hinder proper functioning. This article provides an in-depth guide on troubleshooting and resolving common AC adapter-related problems, ensuring users can efficiently address issues such as failure to charge the battery or power on the laptop. Resolving “Plugged in Not Charging” Issue on Dell 04H6NV 4H6NV

Symptoms of AC Adapter Issues: Users are encouraged to troubleshoot AC adapter problems if they observe any of the following symptoms:

  • Inability to charge the battery.
  • Failure to power on the Dell 04H6NV 4H6NV.
  • AC adapter LED is off.
  • AC adapter LED turns off after connecting to the machine Dell 04H6NV 4H6NV.
  • Error message indicating the inability to determine the AC adapter type, impacting computer performance.

Possible Causes: AC adapter issues can stem from various sources, including a faulty AC adapter, damaged power cables, issues with the DC-in connector on the laptop, or other related problems. It’s crucial to identify the root cause to implement effective solutions.

Resolution: Troubleshooting Steps:

  1. Inspect for Damages:
    • Check the AC adapter, cables, and the adapter port on the laptop for physical damage.
    • Examine the AC adapter cable, power cable, and the pins for signs of wear, fraying, or exposure.
  2. Verify Wall Outlet Functionality:
    • Ensure the wall outlet is working correctly by connecting another device.
    • Plug the AC adapter directly into the wall outlet to isolate issues with power regulators or docking stations.
  3. Drain Residual Power:
    • Disconnect all devices.
    • Remove the battery (if removable) and drain residual power by holding the power button for 30 seconds.
    • Reconnect the battery and test the laptop.
  4. Connect to the Correct USB-C Power Port:
    • For laptops with USB-C charging ports, ensure the USB-C charger is connected to the correct port supporting charging.
  5. Reseat Power Cable and AC Adapter:
    • Disconnect and reconnect the power cable and AC adapter.
    • Check the LED indicator on the AC adapter for proper functioning.
  6. Check AC Adapter LED Indicator:
    • Reset the AC adapter by unplugging it for 15 seconds.
    • Reconnect and check the LED indicator’s status.
  7. Verify AC Adapter Wattage:
    • Confirm the correct wattage of the AC adapter to avoid issues like error messages or slow charging.
    • Check the BIOS to ensure the laptop recognizes the AC adapter type correctly.
  8. Run Dell ePSA Hardware Diagnostic Test on Dell 04H6NV 4H6NV:
    • Use Dell SupportAssist Preboot System Assessment or ePSA test to identify hardware issues.
    • Note error codes and contact Dell Technical Support if necessary.
  9. Update the BIOS:
    • Ensure the laptop’s battery is installed and connected to the AC adapter.
    • Update the BIOS to the latest version of Dell 04H6NV 4H6NV for improved AC adapter recognition.

Conclusion: Troubleshooting AC adapter issues on Dell 04H6NV 4H6NV involves a systematic approach to identify and address potential problems. Users are advised to follow these steps carefully, and if issues persist, contacting Dell Technical Support is recommended. Regular maintenance, proper handling of AC adapters, and timely updates contribute to a more reliable and efficient laptop experience. Order the right  Genuine 65W Dell 04H6NV 4H6NV AC Adapter Charger Power Cord

Genuine 65W Dell 04H6NV 4H6NV AC Adapter Charger Power Cord

Troubleshooting AC Adapter Issues on Dell LA90PE1: A Comprehensive Guide

Introduction: Dell LA90PE1, like any electronic device, may encounter AC adapter issues that can hinder proper functioning. This article provides an in-depth guide on troubleshooting and resolving common AC adapter-related problems, ensuring users can efficiently address issues such as failure to charge the battery or power on the laptop. Resolving “Plugged in Not Charging” Issue on Dell LA90PE1

Symptoms of AC Adapter Issues: Users are encouraged to troubleshoot AC adapter problems if they observe any of the following symptoms:

  • Inability to charge the battery.
  • Failure to power on the Dell LA90PE1.
  • AC adapter LED is off.
  • AC adapter LED turns off after connecting to the machine Dell LA90PE1.
  • Error message indicating the inability to determine the AC adapter type, impacting computer performance.

Possible Causes: AC adapter issues can stem from various sources, including a faulty AC adapter, damaged power cables, issues with the DC-in connector on the laptop, or other related problems. It’s crucial to identify the root cause to implement effective solutions.

Resolution: Troubleshooting Steps:

  1. Inspect for Damages:
    • Check the AC adapter, cables, and the adapter port on the laptop for physical damage.
    • Examine the AC adapter cable, power cable, and the pins for signs of wear, fraying, or exposure.
  2. Verify Wall Outlet Functionality:
    • Ensure the wall outlet is working correctly by connecting another device.
    • Plug the AC adapter directly into the wall outlet to isolate issues with power regulators or docking stations.
  3. Drain Residual Power:
    • Disconnect all devices.
    • Remove the battery (if removable) and drain residual power by holding the power button for 30 seconds.
    • Reconnect the battery and test the laptop.
  4. Connect to the Correct USB-C Power Port:
    • For laptops with USB-C charging ports, ensure the USB-C charger is connected to the correct port supporting charging.
  5. Reseat Power Cable and AC Adapter:
    • Disconnect and reconnect the power cable and AC adapter.
    • Check the LED indicator on the AC adapter for proper functioning.
  6. Check AC Adapter LED Indicator:
    • Reset the AC adapter by unplugging it for 15 seconds.
    • Reconnect and check the LED indicator’s status.
  7. Verify AC Adapter Wattage:
    • Confirm the correct wattage of the AC adapter to avoid issues like error messages or slow charging.
    • Check the BIOS to ensure the laptop recognizes the AC adapter type correctly.
  8. Run Dell ePSA Hardware Diagnostic Test on Dell LA90PE1:
    • Use Dell SupportAssist Preboot System Assessment or ePSA test to identify hardware issues.
    • Note error codes and contact Dell Technical Support if necessary.
  9. Update the BIOS:
    • Ensure the laptop’s battery is installed and connected to the AC adapter.
    • Update the BIOS to the latest version of Dell LA90PE1 for improved AC adapter recognition.

Conclusion: Troubleshooting AC adapter issues on Dell LA90PE1 involves a systematic approach to identify and address potential problems. Users are advised to follow these steps carefully, and if issues persist, contacting Dell Technical Support is recommended. Regular maintenance, proper handling of AC adapters, and timely updates contribute to a more reliable and efficient laptop experience. Order the right  Dell LA90PE1 AC Adapter Charger

Dell LA90PE1   AC Adapter Charger

Troubleshooting AC Adapter Issues on Dell Inspiron 17R 5737 i3-4010U: A Comprehensive Guide

Introduction: Dell Inspiron 17R 5737 i3-4010U, like any electronic device, may encounter AC adapter issues that can hinder proper functioning. This article provides an in-depth guide on troubleshooting and resolving common AC adapter-related problems, ensuring users can efficiently address issues such as failure to charge the battery or power on the laptop. Resolving “Plugged in Not Charging” Issue on Dell Inspiron 17R 5737 i3-4010U

Symptoms of AC Adapter Issues: Users are encouraged to troubleshoot AC adapter problems if they observe any of the following symptoms:

  • Inability to charge the battery.
  • Failure to power on the Dell Inspiron 17R 5737 i3-4010U.
  • AC adapter LED is off.
  • AC adapter LED turns off after connecting to the machine Dell Inspiron 17R 5737 i3-4010U.
  • Error message indicating the inability to determine the AC adapter type, impacting computer performance.

Possible Causes: AC adapter issues can stem from various sources, including a faulty AC adapter, damaged power cables, issues with the DC-in connector on the laptop, or other related problems. It’s crucial to identify the root cause to implement effective solutions.

Resolution: Troubleshooting Steps:

  1. Inspect for Damages:
    • Check the AC adapter, cables, and the adapter port on the laptop for physical damage.
    • Examine the AC adapter cable, power cable, and the pins for signs of wear, fraying, or exposure.
  2. Verify Wall Outlet Functionality:
    • Ensure the wall outlet is working correctly by connecting another device.
    • Plug the AC adapter directly into the wall outlet to isolate issues with power regulators or docking stations.
  3. Drain Residual Power:
    • Disconnect all devices.
    • Remove the battery (if removable) and drain residual power by holding the power button for 30 seconds.
    • Reconnect the battery and test the laptop.
  4. Connect to the Correct USB-C Power Port:
    • For laptops with USB-C charging ports, ensure the USB-C charger is connected to the correct port supporting charging.
  5. Reseat Power Cable and AC Adapter:
    • Disconnect and reconnect the power cable and AC adapter.
    • Check the LED indicator on the AC adapter for proper functioning.
  6. Check AC Adapter LED Indicator:
    • Reset the AC adapter by unplugging it for 15 seconds.
    • Reconnect and check the LED indicator’s status.
  7. Verify AC Adapter Wattage:
    • Confirm the correct wattage of the AC adapter to avoid issues like error messages or slow charging.
    • Check the BIOS to ensure the laptop recognizes the AC adapter type correctly.
  8. Run Dell ePSA Hardware Diagnostic Test on Dell Inspiron 17R 5737 i3-4010U:
    • Use Dell SupportAssist Preboot System Assessment or ePSA test to identify hardware issues.
    • Note error codes and contact Dell Technical Support if necessary.
  9. Update the BIOS:
    • Ensure the laptop’s battery is installed and connected to the AC adapter.
    • Update the BIOS to the latest version of Dell Inspiron 17R 5737 i3-4010U for improved AC adapter recognition.

Conclusion: Troubleshooting AC adapter issues on Dell Inspiron 17R 5737 i3-4010U involves a systematic approach to identify and address potential problems. Users are advised to follow these steps carefully, and if issues persist, contacting Dell Technical Support is recommended. Regular maintenance, proper handling of AC adapters, and timely updates contribute to a more reliable and efficient laptop experience. Order the right  Dell Inspiron 17R 5737 i3-4010U AC Adapter Charger

Dell Inspiron 17R 5737 i3-4010U AC Adapter Charger

Troubleshooting AC Adapter Issues on Dell Latitude 5340: A Comprehensive Guide

Introduction: Dell Latitude 5340, like any electronic device, may encounter AC adapter issues that can hinder proper functioning. This article provides an in-depth guide on troubleshooting and resolving common AC adapter-related problems, ensuring users can efficiently address issues such as failure to charge the battery or power on the laptop. Resolving “Plugged in Not Charging” Issue on Dell Latitude 5340

Symptoms of AC Adapter Issues: Users are encouraged to troubleshoot AC adapter problems if they observe any of the following symptoms:

  • Inability to charge the battery.
  • Failure to power on the Dell Latitude 5340.
  • AC adapter LED is off.
  • AC adapter LED turns off after connecting to the machine Dell Latitude 5340.
  • Error message indicating the inability to determine the AC adapter type, impacting computer performance.

Possible Causes: AC adapter issues can stem from various sources, including a faulty AC adapter, damaged power cables, issues with the DC-in connector on the laptop, or other related problems. It’s crucial to identify the root cause to implement effective solutions.

Resolution: Troubleshooting Steps:

  1. Inspect for Damages:
    • Check the AC adapter, cables, and the adapter port on the laptop for physical damage.
    • Examine the AC adapter cable, power cable, and the pins for signs of wear, fraying, or exposure.
  2. Verify Wall Outlet Functionality:
    • Ensure the wall outlet is working correctly by connecting another device.
    • Plug the AC adapter directly into the wall outlet to isolate issues with power regulators or docking stations.
  3. Drain Residual Power:
    • Disconnect all devices.
    • Remove the battery (if removable) and drain residual power by holding the power button for 30 seconds.
    • Reconnect the battery and test the laptop.
  4. Connect to the Correct USB-C Power Port:
    • For laptops with USB-C charging ports, ensure the USB-C charger is connected to the correct port supporting charging.
  5. Reseat Power Cable and AC Adapter:
    • Disconnect and reconnect the power cable and AC adapter.
    • Check the LED indicator on the AC adapter for proper functioning.
  6. Check AC Adapter LED Indicator:
    • Reset the AC adapter by unplugging it for 15 seconds.
    • Reconnect and check the LED indicator’s status.
  7. Verify AC Adapter Wattage:
    • Confirm the correct wattage of the AC adapter to avoid issues like error messages or slow charging.
    • Check the BIOS to ensure the laptop recognizes the AC adapter type correctly.
  8. Run Dell ePSA Hardware Diagnostic Test on Dell Latitude 5340:
    • Use Dell SupportAssist Preboot System Assessment or ePSA test to identify hardware issues.
    • Note error codes and contact Dell Technical Support if necessary.
  9. Update the BIOS:
    • Ensure the laptop’s battery is installed and connected to the AC adapter.
    • Update the BIOS to the latest version of Dell Latitude 5340 for improved AC adapter recognition.

Conclusion: Troubleshooting AC adapter issues on Dell Latitude 5340 involves a systematic approach to identify and address potential problems. Users are advised to follow these steps carefully, and if issues persist, contacting Dell Technical Support is recommended. Regular maintenance, proper handling of AC adapters, and timely updates contribute to a more reliable and efficient laptop experience. Order the right  Dell Latitude 5340 AC Adapter Charger

Dell Latitude 5340 AC Adapter Charger

Troubleshooting AC Adapter Issues on Dell 0K8WXN: A Comprehensive Guide

Introduction: Dell 0K8WXN, like any electronic device, may encounter AC adapter issues that can hinder proper functioning. This article provides an in-depth guide on troubleshooting and resolving common AC adapter-related problems, ensuring users can efficiently address issues such as failure to charge the battery or power on the laptop. Resolving “Plugged in Not Charging” Issue on Dell 0K8WXN

Symptoms of AC Adapter Issues: Users are encouraged to troubleshoot AC adapter problems if they observe any of the following symptoms:

  • Inability to charge the battery.
  • Failure to power on the Dell 0K8WXN.
  • AC adapter LED is off.
  • AC adapter LED turns off after connecting to the machine Dell 0K8WXN.
  • Error message indicating the inability to determine the AC adapter type, impacting computer performance.

Possible Causes: AC adapter issues can stem from various sources, including a faulty AC adapter, damaged power cables, issues with the DC-in connector on the laptop, or other related problems. It’s crucial to identify the root cause to implement effective solutions.

Resolution: Troubleshooting Steps:

  1. Inspect for Damages:
    • Check the AC adapter, cables, and the adapter port on the laptop for physical damage.
    • Examine the AC adapter cable, power cable, and the pins for signs of wear, fraying, or exposure.
  2. Verify Wall Outlet Functionality:
    • Ensure the wall outlet is working correctly by connecting another device.
    • Plug the AC adapter directly into the wall outlet to isolate issues with power regulators or docking stations.
  3. Drain Residual Power:
    • Disconnect all devices.
    • Remove the battery (if removable) and drain residual power by holding the power button for 30 seconds.
    • Reconnect the battery and test the laptop.
  4. Connect to the Correct USB-C Power Port:
    • For laptops with USB-C charging ports, ensure the USB-C charger is connected to the correct port supporting charging.
  5. Reseat Power Cable and AC Adapter:
    • Disconnect and reconnect the power cable and AC adapter.
    • Check the LED indicator on the AC adapter for proper functioning.
  6. Check AC Adapter LED Indicator:
    • Reset the AC adapter by unplugging it for 15 seconds.
    • Reconnect and check the LED indicator’s status.
  7. Verify AC Adapter Wattage:
    • Confirm the correct wattage of the AC adapter to avoid issues like error messages or slow charging.
    • Check the BIOS to ensure the laptop recognizes the AC adapter type correctly.
  8. Run Dell ePSA Hardware Diagnostic Test on Dell 0K8WXN:
    • Use Dell SupportAssist Preboot System Assessment or ePSA test to identify hardware issues.
    • Note error codes and contact Dell Technical Support if necessary.
  9. Update the BIOS:
    • Ensure the laptop’s battery is installed and connected to the AC adapter.
    • Update the BIOS to the latest version of Dell 0K8WXN for improved AC adapter recognition.

Conclusion: Troubleshooting AC adapter issues on Dell 0K8WXN involves a systematic approach to identify and address potential problems. Users are advised to follow these steps carefully, and if issues persist, contacting Dell Technical Support is recommended. Regular maintenance, proper handling of AC adapters, and timely updates contribute to a more reliable and efficient laptop experience. Order the right  Dell 0K8WXN AC Adapter Charger

Dell 0K8WXN AC Adapter Charger

Troubleshooting AC Adapter Issues on Dell Latitude 13 7370 7368: A Comprehensive Guide

Introduction: Dell Latitude 13 7370 7368, like any electronic device, may encounter AC adapter issues that can hinder proper functioning. This article provides an in-depth guide on troubleshooting and resolving common AC adapter-related problems, ensuring users can efficiently address issues such as failure to charge the battery or power on the laptop. Resolving “Plugged in Not Charging” Issue on Dell Latitude 13 7370 7368

Symptoms of AC Adapter Issues: Users are encouraged to troubleshoot AC adapter problems if they observe any of the following symptoms:

  • Inability to charge the battery.
  • Failure to power on the Dell Latitude 13 7370 7368.
  • AC adapter LED is off.
  • AC adapter LED turns off after connecting to the machine Dell Latitude 13 7370 7368.
  • Error message indicating the inability to determine the AC adapter type, impacting computer performance.

Possible Causes: AC adapter issues can stem from various sources, including a faulty AC adapter, damaged power cables, issues with the DC-in connector on the laptop, or other related problems. It’s crucial to identify the root cause to implement effective solutions.

Resolution: Troubleshooting Steps:

  1. Inspect for Damages:
    • Check the AC adapter, cables, and the adapter port on the laptop for physical damage.
    • Examine the AC adapter cable, power cable, and the pins for signs of wear, fraying, or exposure.
  2. Verify Wall Outlet Functionality:
    • Ensure the wall outlet is working correctly by connecting another device.
    • Plug the AC adapter directly into the wall outlet to isolate issues with power regulators or docking stations.
  3. Drain Residual Power:
    • Disconnect all devices.
    • Remove the battery (if removable) and drain residual power by holding the power button for 30 seconds.
    • Reconnect the battery and test the laptop.
  4. Connect to the Correct USB-C Power Port:
    • For laptops with USB-C charging ports, ensure the USB-C charger is connected to the correct port supporting charging.
  5. Reseat Power Cable and AC Adapter:
    • Disconnect and reconnect the power cable and AC adapter.
    • Check the LED indicator on the AC adapter for proper functioning.
  6. Check AC Adapter LED Indicator:
    • Reset the AC adapter by unplugging it for 15 seconds.
    • Reconnect and check the LED indicator’s status.
  7. Verify AC Adapter Wattage:
    • Confirm the correct wattage of the AC adapter to avoid issues like error messages or slow charging.
    • Check the BIOS to ensure the laptop recognizes the AC adapter type correctly.
  8. Run Dell ePSA Hardware Diagnostic Test on Dell Latitude 13 7370 7368:
    • Use Dell SupportAssist Preboot System Assessment or ePSA test to identify hardware issues.
    • Note error codes and contact Dell Technical Support if necessary.
  9. Update the BIOS:
    • Ensure the laptop’s battery is installed and connected to the AC adapter.
    • Update the BIOS to the latest version of Dell Latitude 13 7370 7368 for improved AC adapter recognition.

Conclusion: Troubleshooting AC adapter issues on Dell Latitude 13 7370 7368 involves a systematic approach to identify and address potential problems. Users are advised to follow these steps carefully, and if issues persist, contacting Dell Technical Support is recommended. Regular maintenance, proper handling of AC adapters, and timely updates contribute to a more reliable and efficient laptop experience. Order the right  Dell Latitude 13 7370 7368 AC Adapter Charger

Dell Latitude 13 7370 7368 AC Adapter Charger